How to Set Up an Online Store
It's easy to start an online store on your own. But just because you know how to set up a website doesn't mean you know what steps to take for success. This post covers the basics of setting up an online store and offers some tips for success, including choosing a platform or marketplace, hosting services, payment processors, and more. Read more to discover how you can start your own online store for free.
Let’s start with the basics of setting up an online store with WordPress + WooCommerce.
For those of you who are just starting and want to set up your own online store, this guide is for you. WooCommerce is a free plugin that will allow you to sell products on WordPress in minutes. Plugins are like apps that integrate into WordPress to add functionality to your site. The WooCommerce plugin will add a storefront function to your website so you can sell products, receive payments, and track orders without coding experience.
It’s intimidating for beginners, so let us review some of the steps involved in building your online store. To get started, all you need is a website that WordPress powers—we’ll show you how to do the rest using WooCommerce. This free and open-source plugin allows you to quickly set up a functioning web store complete with payment and shipping options in minutes.
What you’ll need to get started
- A website powered by WordPress
- Products, digital downloads, or services to sell
- A dedicated time to set up and add products to your online store. In this post, we’ll cover 6 steps to get your WooCommerce Store Setup
Step 1: Find and install the WooCommerce Plugin from your WordPress Dashboard.
The Woocommerce plugin is available as a free download. Log into your WordPress dashboard. On the left side of your screen, scroll down to the Plugins tab. You can hover over the tab or click on it to get to the >Add New option.
Use the search box on the top right corner to search for WooCommerce. When you find it, click >Install Now. Give it a moment to install. Once it’s complete, click >Activate.
Now the plugin will be active on your WordPress site.
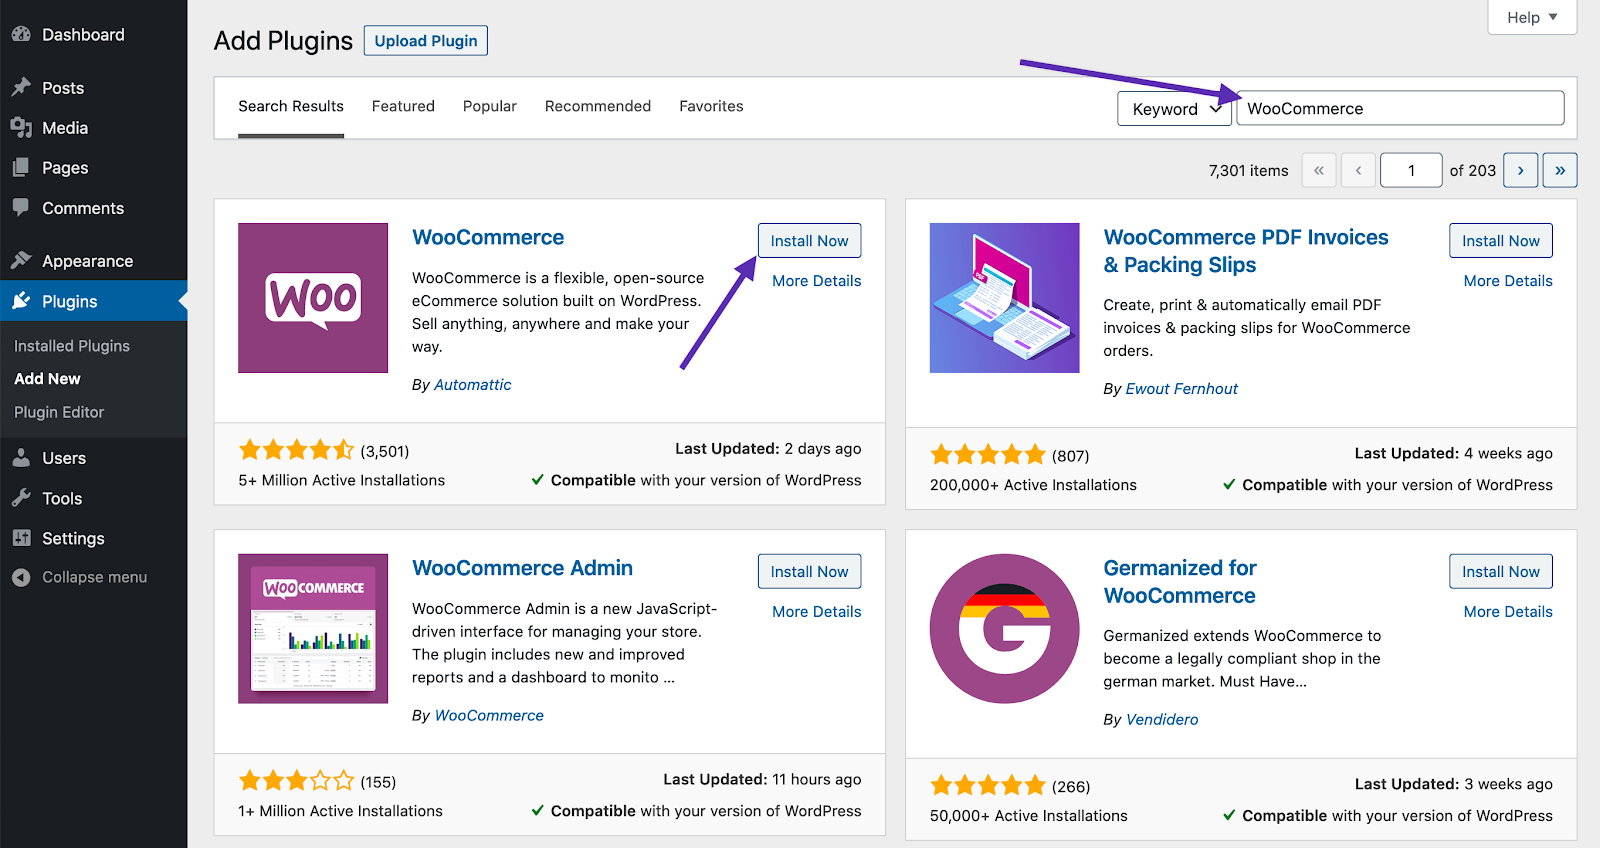
Step 2: Next, Follow the Setup Wizard
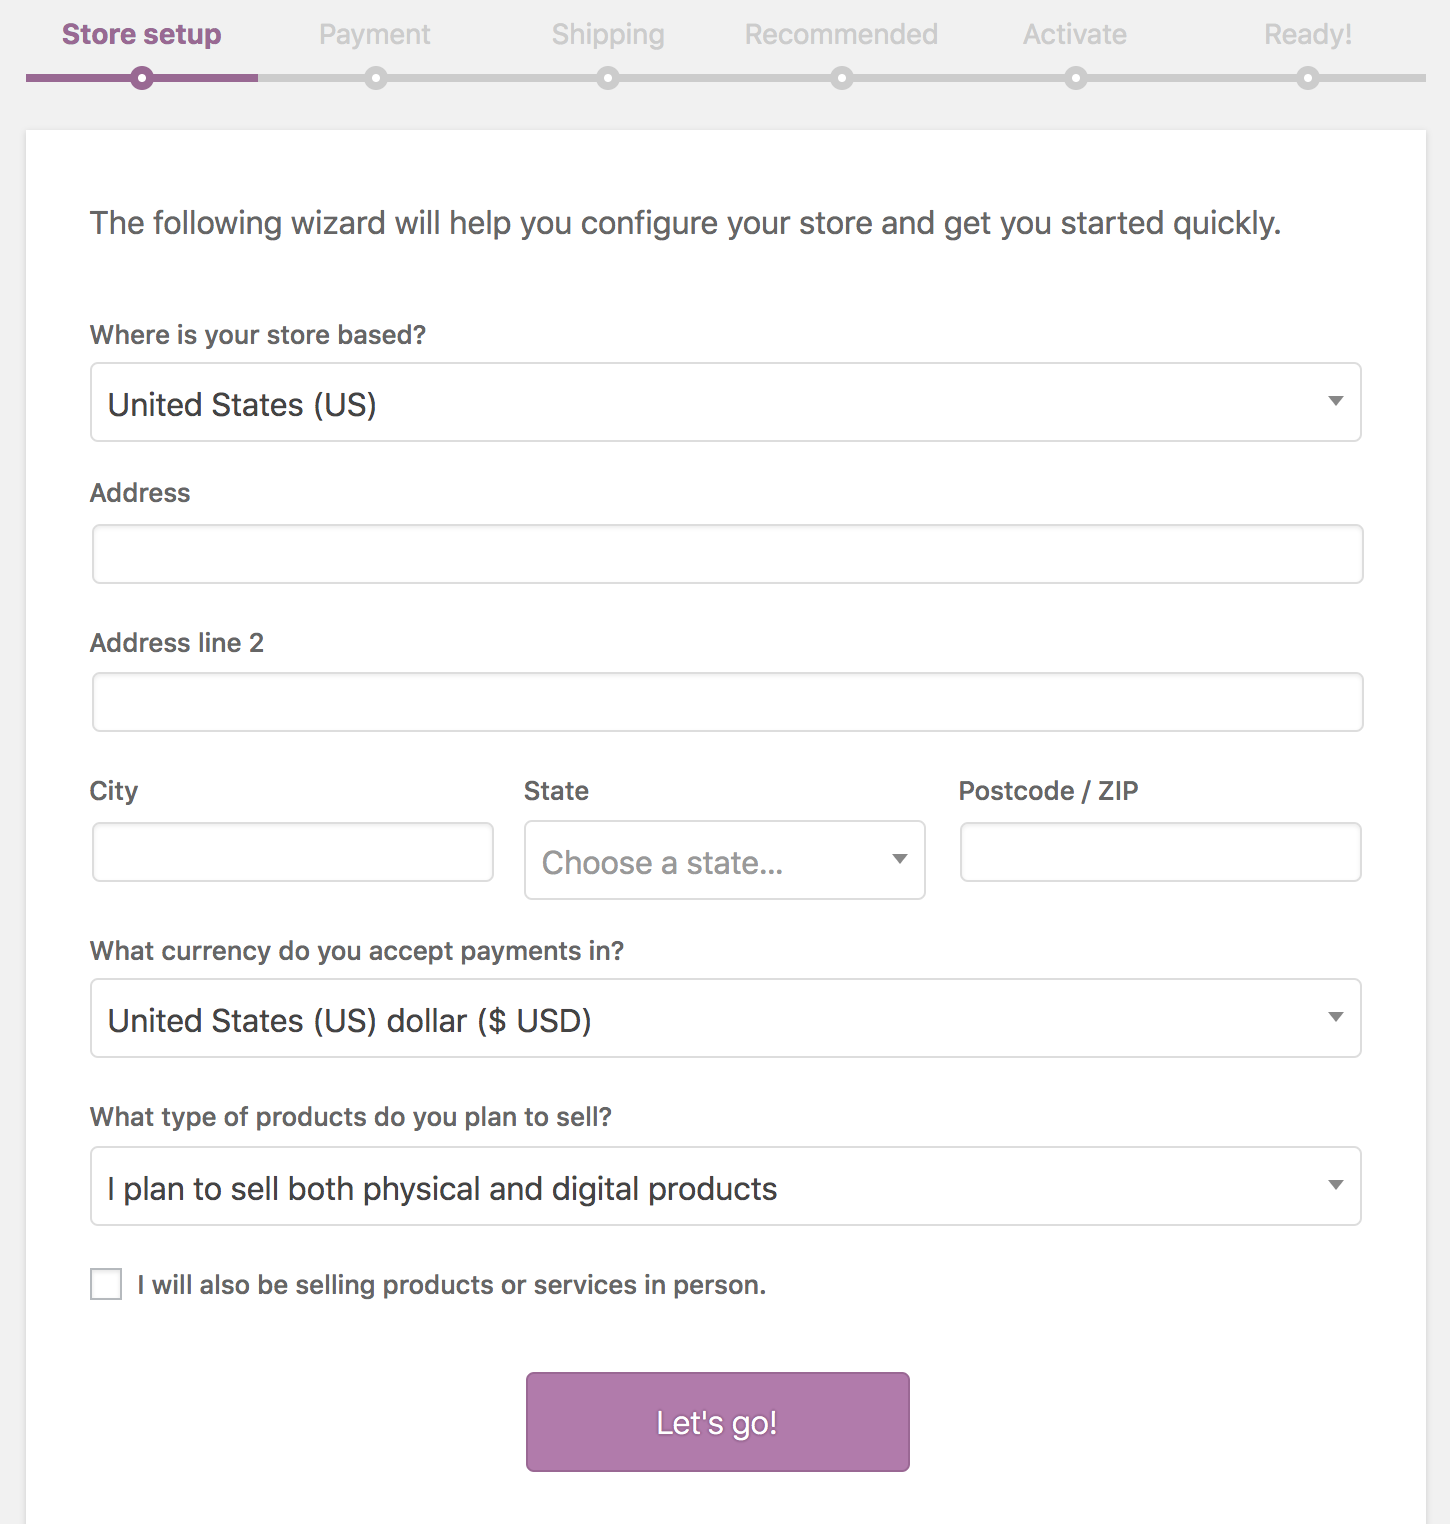
After installing WooCommerce, you’ll have access to the WooCommerce Setup Wizard. The setup wizard will help you configure your online store’s settings, such as location information, payment gateways, and shipping methods, as well as the types of products you’ll be offering to your customers.
(Note: everything you choose in the setup wizard can be changed later on in your WooCommerce settings.)
Follow the line graph for each section: Store Setup, Payment, Shipping, Recommended, Active, and Ready.
You’ll first enter information about your store’s address, the currency you accept, and whether you’ll be selling digital or physical products (or both). If you plan on selling products or services in person, be sure to check the box near the bottom before moving on to the next page.
Step 3: Choose Your Payment Processing Methods
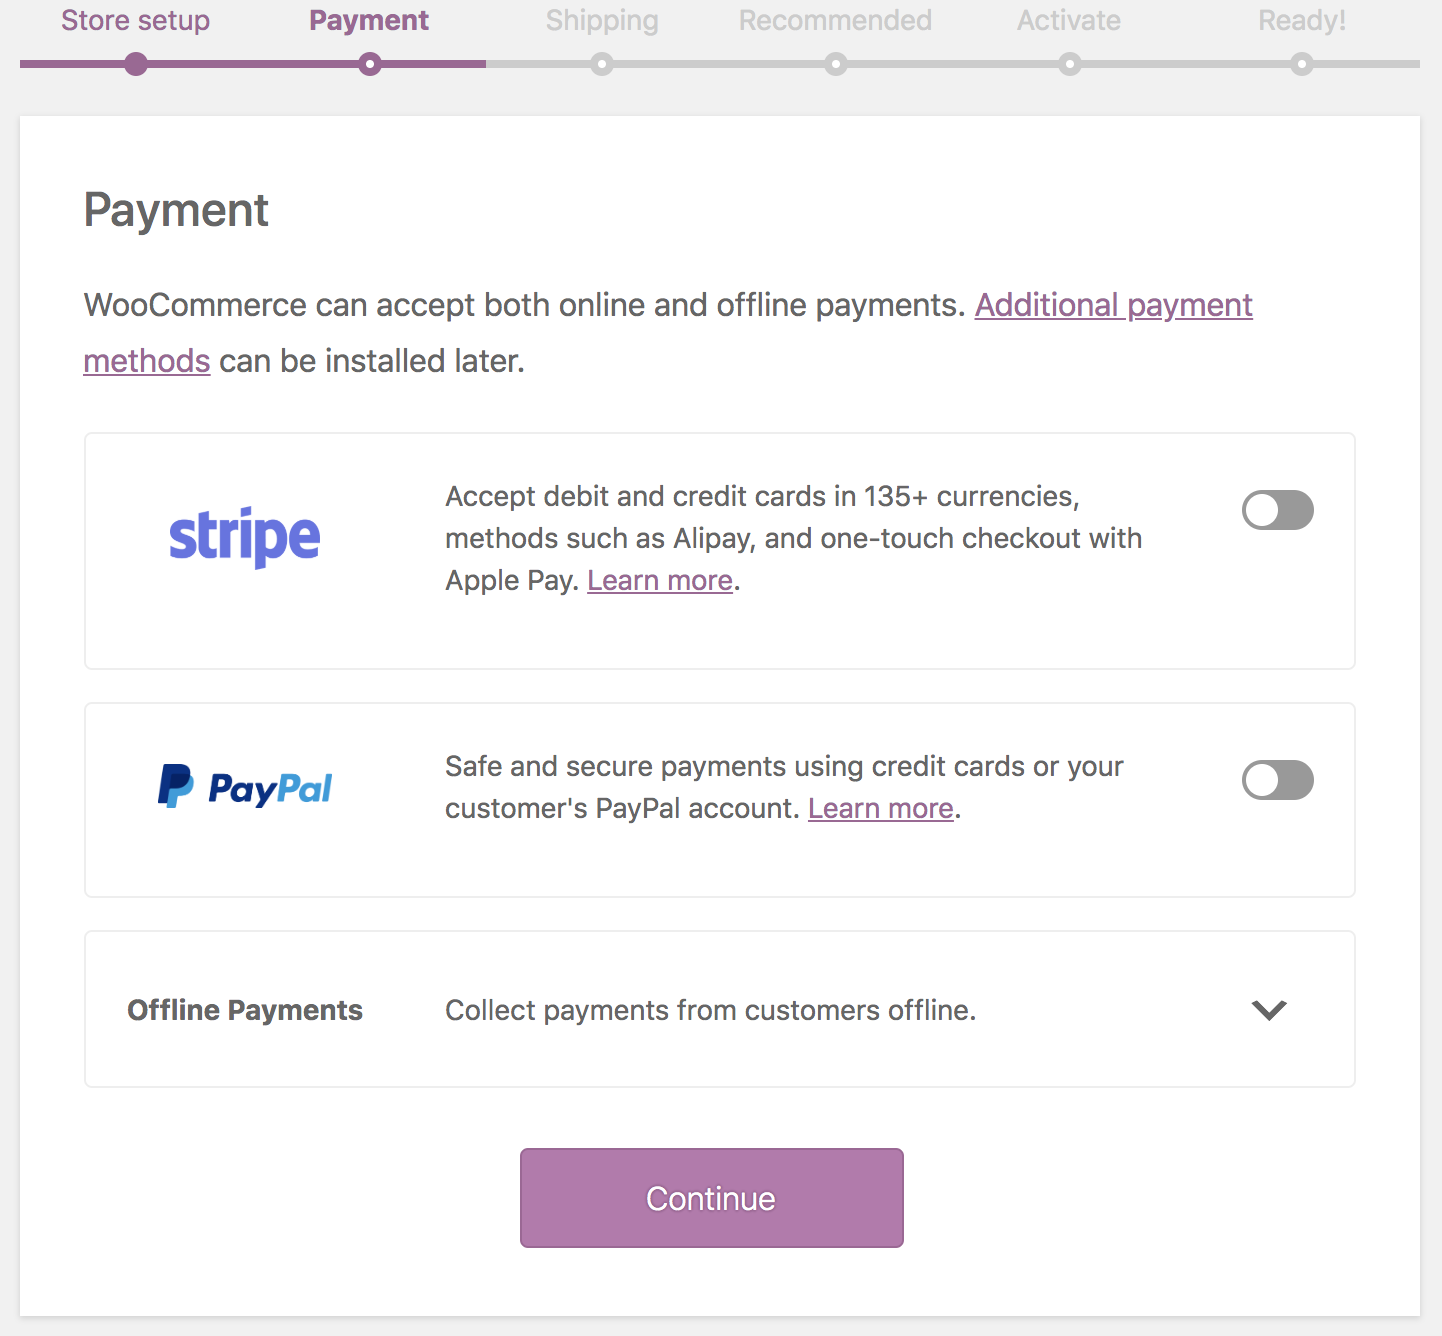
Here you will choose which payment methods you’ll accept from your customers as they check out on your store. The system is set up to default to Stripe or PayPal, but other options and methods are available, such as accepting a check or cash payments.
Notice that you can toggle the payment methods to use Stripe or PayPal on or off. Selecting a payment option for your store is easy.
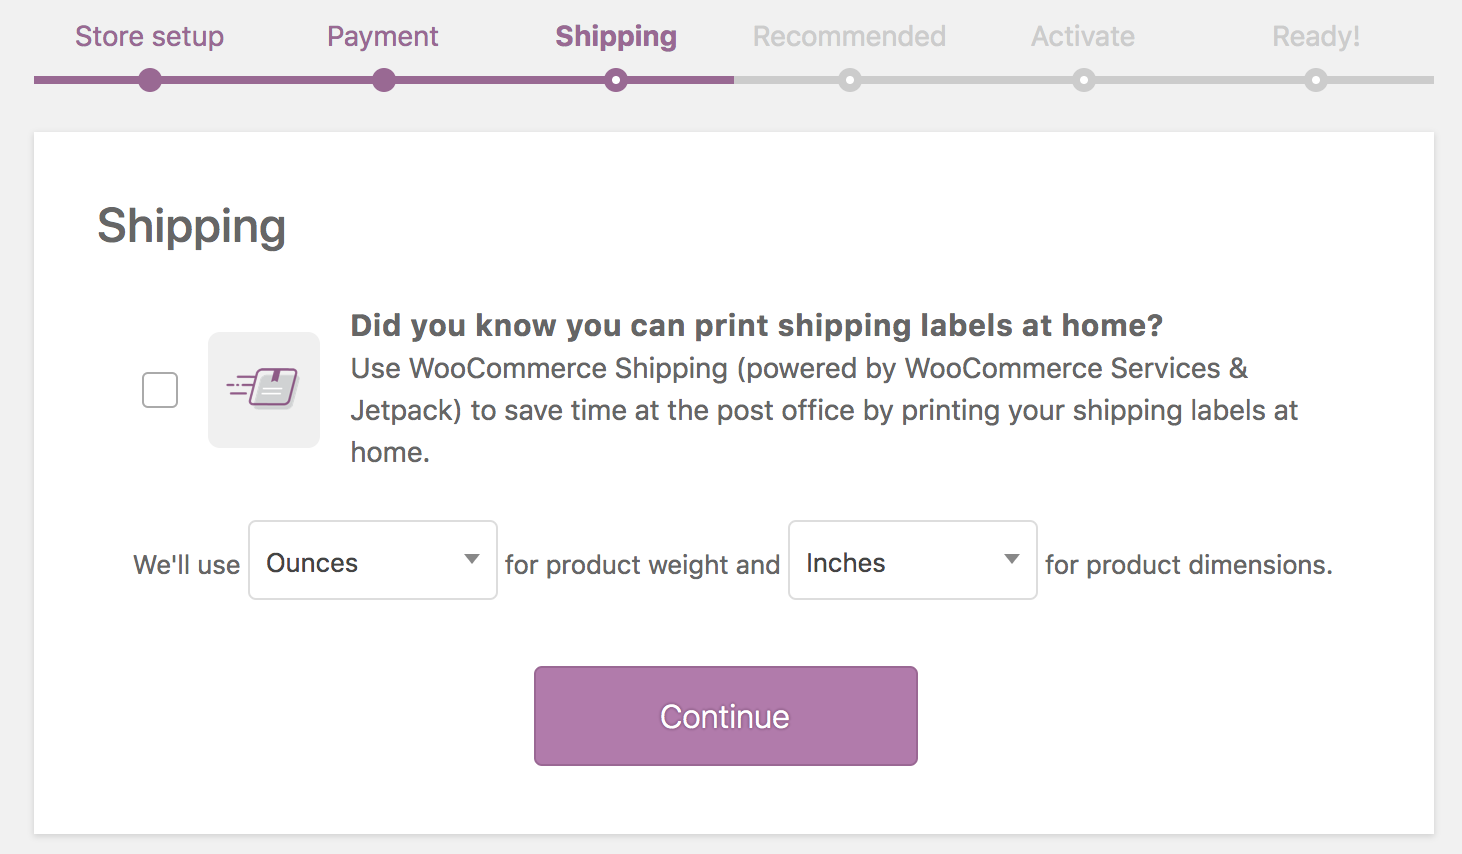
Step 4: Choose a shipping method.
Customers are charged for shipping differently depending on the business area they live in. You can also set specific rates to customers outside of your business’ region and even offer free delivery if you want!
One way that businesses charge their customer is by offering them different prices based on where they're located. So a company may have more than one shipping price depending on what part of the country it's being shipped to.
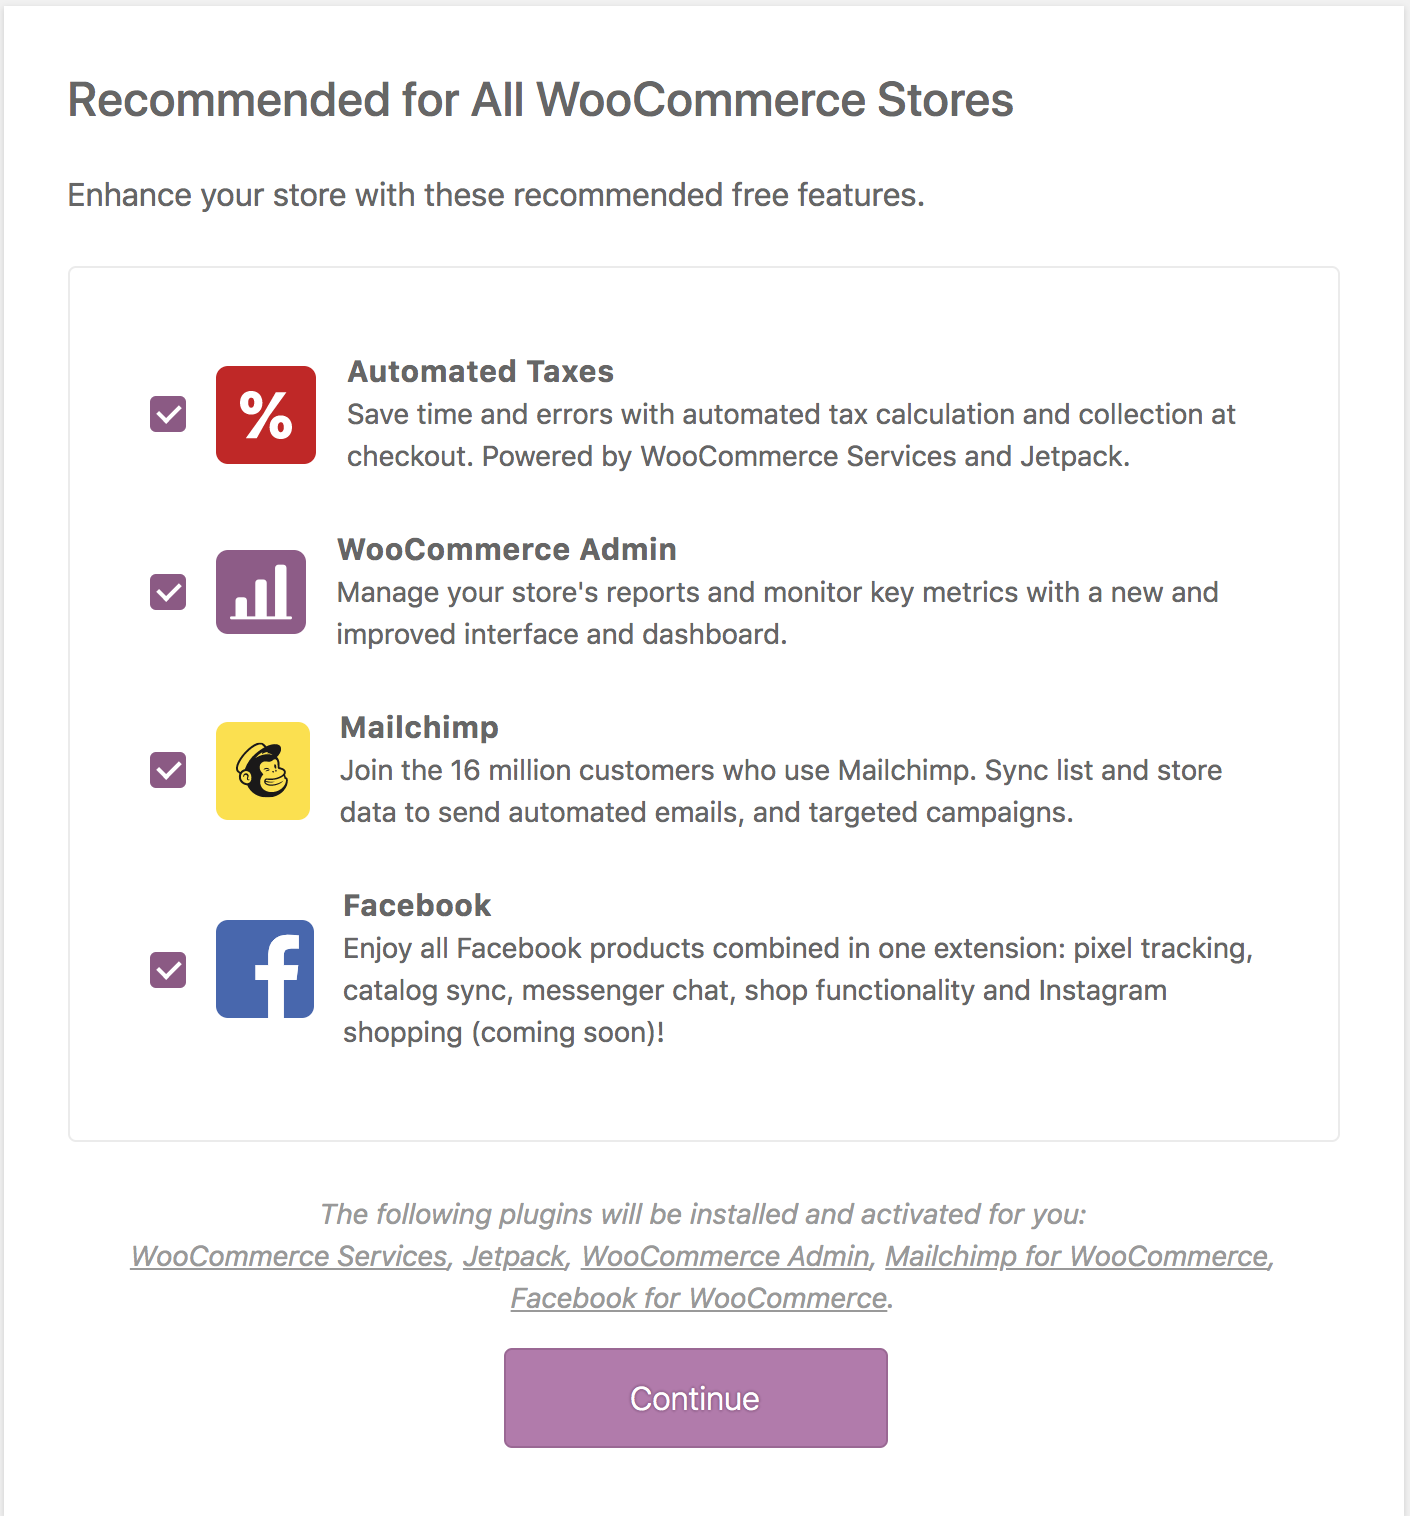
Step 5: Choose optional add-ons.
Before you finish creating an eCommerce website, you can review recommendations to help set up a business. Once you’ve configured the basic settings for your online WooCommerce store, you can review optional add-ons. None of these add-ons are necessary to run your store, but some, such as Storefront, can simplify certain aspects of setting up your store.
Step 6: Finish setup
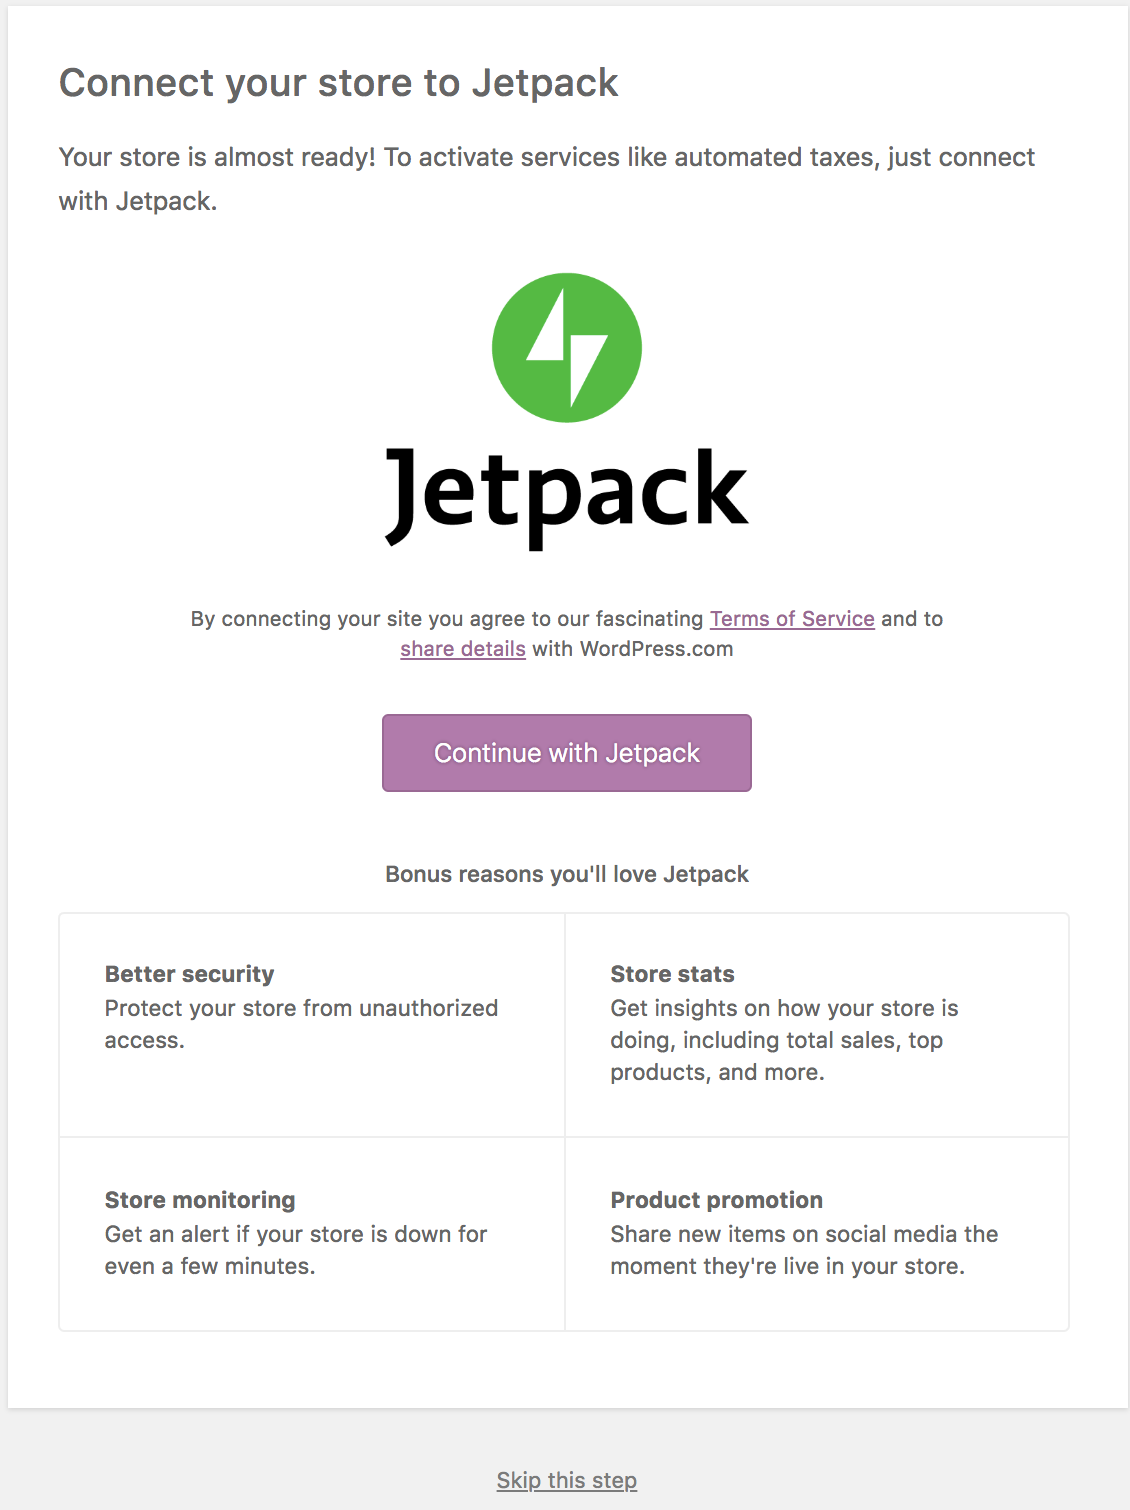
Before completing the setup process, you can choose to enable Jetpack, another WordPress plugin with additional features that can help set up and run your store. This plugin is not required; however, WooCommerce recommends that if you’re in the U.S., you’ll want to enable Jetpack given recent legal changes.
(Note: Remember that recommendations are optional.)
Conclusion
Creating an online store is a big undertaking with many moving parts. Thankfully, there are plenty of tools and resources to help you get your business off the ground without breaking a sweat! In this post, we covered how to set up an online store with WordPress + WooCommerce for your new site so you can start selling products online. We want to make sure your site operates smoothly from start to finish.
Need some extra guidance? We can provide hosting services and SEO/content management to make sure everything is in order before launch day arrives.
Reach out today if you want more information or have any questions about getting started on building your dream website!

